How to Program a Garage Door Opener in Cleveland: The Complete Guide for Every Brand and Age
Programming a garage door opener in Cleveland usually means pressing the “Learn” button on the motor unit, then pressing the button on your remote within 30 seconds until the opener lights flash or you hear two clicks. For most openers manufactured after 2011 — the LiftMaster, Chamberlain, and Craftsman models with Security+ 2.0 — that’s genuinely all there is to it. But here’s the problem: in Cleveland’s post-WWII ranch belt running through Parma, Garfield Heights, and Euclid, we’re still servicing openers from 2005, 1998, even the early 1990s, and those units don’t always have a Learn button or use the same radio protocol. If you’re standing in a Cleveland garage with a universal remote that “should work” and it doesn’t, or your car’s HomeLink system won’t pair no matter what the manual says, the issue is almost certainly that you’re mixing protocols from different eras. Call us at (855) 502-5513 if you get stuck — we program openers same-day across Greater Cleveland, and estimates are free.
Why Cleveland’s Housing Stock Makes Opener Programming Trickier Than the Internet Suggests
Cleveland’s lakefront geography and industrial history created a housing landscape you won’t find in newer Midwest cities. The massive post-WWII ranch-home belt through Parma, Garfield Heights, and Euclid now holds 60–70-year-old attached garages with original construction — and many of those garages still run openers that predate the standardized Learn-button era. We’ve walked into Cleveland Heights basements where the opener’s from 2003 and the homeowner’s trying to pair a 2024 remote. It won’t work. The radio frequencies, security protocols, and even the physical programming methods are incompatible.
Meanwhile, inner-ring neighborhoods like Ohio City and Tremont have their own curveball: alley-accessed single-car garages built in the 1920s and 30s, often with sub-8-foot-wide openings and electrical service that was retrofitted decades later. The opener in those spaces might be a newer unit shoehorned into an old structure, or it might be the third replacement in thirty years, with a mismatched remote from the previous owner still sitting in the kitchen drawer.
Lake Erie’s punishing freeze-thaw cycling doesn’t just snap springs and burn out motors — it forces premature opener replacement in garages that aren’t weather-sealed well, which means Cleveland homeowners are more likely than Columbus or Pittsburgh residents to face the “new remote, old opener” mismatch. That 15-year-old Genie in your Garfield Heights garage might still run fine mechanically, but good luck finding a modern remote that speaks its language.
The Protocol Split: What You’re Actually Dealing With
Before you can program anything, you need to know which radio protocol your opener uses. This is where most DIY guides fail Cleveland homeowners — they assume every opener has a purple, yellow, red, or orange Learn button and a rolling-code Security+ system. That’s only true for units made roughly 2011 and later.
Post-2011: Security+ 2.0 and the Learn Button System
LiftMaster, Chamberlain, and most Craftsman openers from 2011 forward use Security+ 2.0. The motor unit has a colored Learn button — purple, yellow, red/orange, or green — that corresponds to the radio frequency. Programming is straightforward:
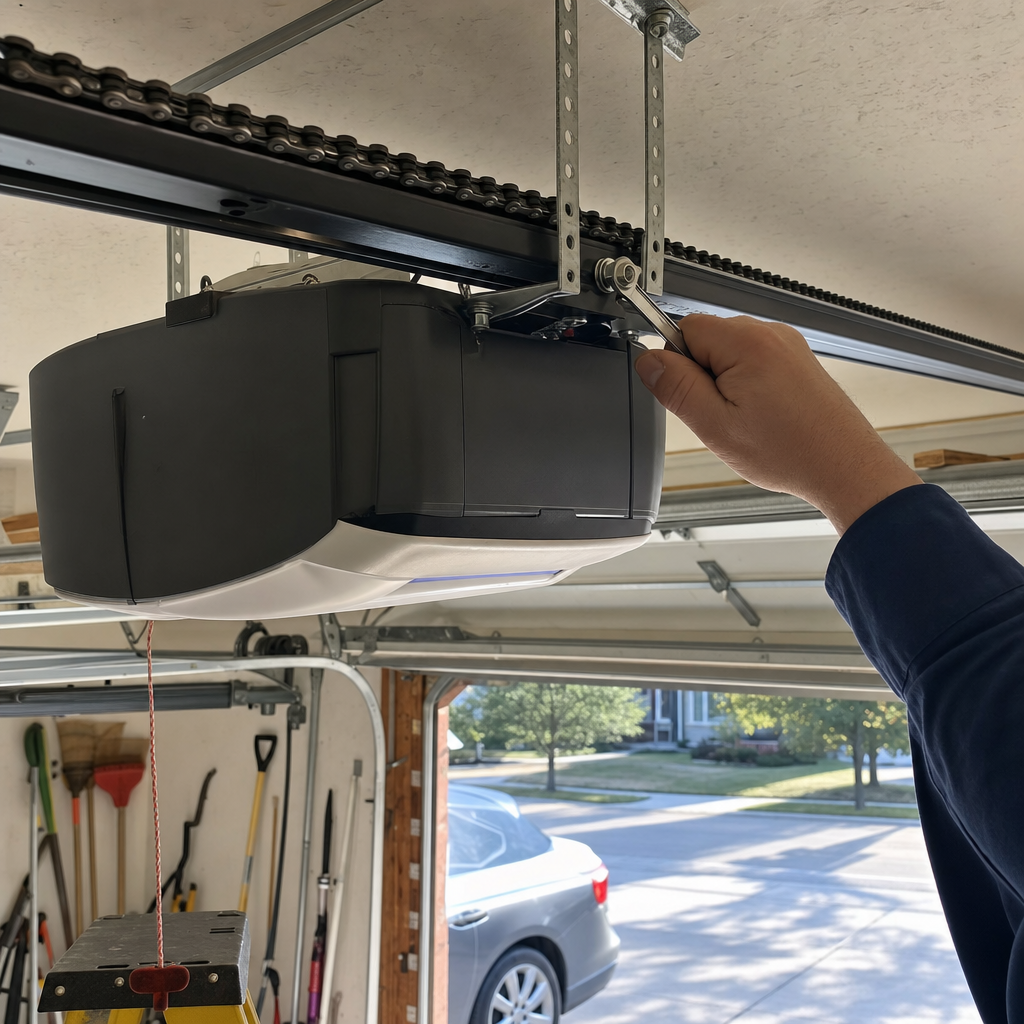
- Locate the Learn button on the side or back of the motor unit (you may need to remove the light cover)
- Press and release the Learn button — the LED next to it will glow steadily for 30 seconds
- Press and hold the button on your remote that you want to program
- Release when the opener lights flash or you hear two clicks
- Test the remote
For LiftMaster and Chamberlain MyQ-enabled units, there’s also app-based programming through the MyQ smartphone platform. We’ve installed hundreds of these across Cleveland’s eastern suburbs, and the app method is genuinely convenient — when the home’s WiFi reaches the garage. In older Cleveland homes with plaster walls or aluminum siding, that signal can be spotty, and we end up falling back to manual Learn-button programming more often than you’d expect.
Pre-2011: DIP Switches, Fixed Codes, and the Units Without Learn Buttons
Here’s where Cleveland’s aging housing stock bites you. If your opener was manufactured before roughly 2011, you might find:
- DIP switch remotes: Small sliding switches inside both the remote and the motor unit that must match position-for-position. Common on older Genie, Craftsman, and some Raynor units through the early 2000s.
- Fixed-code systems: No Learn button, no DIP switches — the remote and receiver were factory-paired or required a specific sequence of button presses to enter programming mode. These are increasingly hard to replace when remotes fail.
- Intellicode I vs. Intellicode II: Genie’s proprietary rolling-code systems. Intellicode I (pre-2009) and Intellicode II (2009–2011) are not cross-compatible with modern Genie remotes without a specific adapter.
In Parma, where we’ve worked for 14 years, we regularly see Craftsman openers from the Sears era that share LiftMaster internals but use a red Learn button and an older 390 MHz frequency — incompatible with modern 315 MHz or Security+ 2.0 remotes without a frequency-specific replacement. The homeowner who buys a “universal” remote at a big-box store and expects it to work is usually disappointed. We’ve taken that call at least a hundred times.
Wayne Dalton and Raynor: The Dealer-Level Exceptions
Wayne Dalton openers — less common in Cleveland but present in some 1990s–2000s construction — used proprietary radio systems that don’t play well with universal remotes at all. Their Quantum and Prodigy lines require Wayne Dalton-specific remotes or a compatible conversion receiver. We’ve stocked these parts specifically because general hardware stores don’t carry them.
Raynor is a trickier case. Many Raynor openers are rebadged LiftMaster units and program identically. But Raynor also produced proprietary systems, particularly for commercial and gated-community installations, that require dealer-level remote pairing. If you’re in a Cleveland condo or townhouse complex with a Raynor system and your remote won’t program, the issue might be that the system uses an encrypted community code your property manager controls — not something you can reset from your garage.
Programming Your Car’s HomeLink System: The Bridge Module Nobody Tells You About
This is the single most common “I followed the instructions and it still doesn’t work” scenario we encounter in Cleveland. HomeLink — the three-button system built into most vehicles from 2015 forward — seems like it should be universal. It isn’t.
HomeLink’s compatibility problem centers on Security+ 2.0. The HomeLink system in your vehicle may support it natively, or it may not. Here’s the critical detail most car manuals gloss over: if your opener has a yellow Learn button (Security+ 2.0, 2011–present) and your vehicle’s HomeLink system was manufactured before a specific software revision, you’ll need a HomeLink Compatibility Bridge — a small plug-in module that translates between your car’s HomeLink signal and the opener’s Security+ 2.0 protocol.
The bridge costs roughly $25–$50 and plugs into a standard outlet near your opener. Without it, your car will cycle through “training” mode indefinitely, the opener’s Learn button will flash as if it’s receiving a signal, but the pairing never completes. We’ve had Cleveland customers spend two weekends on this before calling us. The bridge takes five minutes to install.
For Genie Intellicode openers, HomeLink compatibility is similarly finicky. Genie openers with Intellicode 2 (green Learn button, roughly 2011–present) usually work with newer HomeLink systems directly. Older Genie units may require Genie’s own HomeLink compatibility kit.
The practical reality in Cleveland: if you’re driving a 2018 Honda or a 2020 Ford and trying to pair with the opener in your inherited Euclid ranch home, check the opener’s manufacture date before you start. If it’s pre-2011, call us at (855) 502-5513 — we’ll tell you over the phone whether you need a bridge, a new remote, or whether the opener itself is too old to be worth the hassle.
When Programming Fails: Diagnostic Steps Before You Call
After 14 years in Cleveland garages, we’ve seen the same failure patterns repeat. If your programming attempt isn’t working, run through this triage:
The Learn Button Flashes But Won’t Hold the Code
This usually means the opener’s memory is full. Most openers can store 5–7 remote codes, and if you’ve added remotes over the years without clearing old ones, you’ve hit the limit. The fix: hold the Learn button for 6–10 seconds until the LED goes out — this erases all stored remotes. Then reprogram the ones you actually use. We’ve found this in West Park homes where three generations of remotes are still technically paired from previous owners.
The Remote Programs But Works Intermittently
Check for radio interference. Cleveland’s dense older neighborhoods — Ohio City, Tremont, Detroit-Shoreway — have overlapping WiFi networks, baby monitors, and LED light bulbs that can crowd the 315 MHz or 390 MHz bands your opener uses. Try programming with the LED bulb in the opener removed. If reliability improves, the bulb’s ballast is the culprit. We’ve replaced dozens of “faulty” remotes that were actually fine.
Nothing Happens at All
If the Learn button doesn’t light when pressed, the logic board is likely failing. This is especially common in garages with poor weather sealing — which, given Cleveland’s lake-effect snow and freeze-thaw cycling, describes more garages than not. A logic board replacement runs $120–$320 in our Garage Door Opener in Cleveland service range, but on openers over 12–15 years old, we usually recommend full replacement. The motor, gears, and safety sensors are likely not far behind.
The Universal Remote “Should Work” But Doesn’t
Here’s where we earn our keep. Universal remotes have compatibility gaps that the packaging doesn’t disclose. A “universal” remote might cover 90% of LiftMaster models but miss the specific frequency of your 2007 Craftsman. It might claim Genie compatibility but only for Intellicode II, not the original Intellicode in your unit. After 14 years and certification across 8 major brands, our most common programming call starts with “I bought a universal remote and…” — we know the compatibility tables by heart, and we stock the specific remotes that actually work.
What Programming Should Cost: When DIY Ends and Professional Service Begins
Programming a single remote to a compatible opener is free if you do it yourself and it works. When it doesn’t work, here’s what professional service looks like in the Cleveland market:
| Service | Typical Range in Cleveland |
|---|---|
| Remote programming / troubleshooting | $120–$320 (opener repair service call) |
| HomeLink bridge module + installation | $150–$250 (parts + labor) |
| Replacement remote (brand-specific) | $35–$85 |
| Logic board replacement | $120–$320 |
| New opener installation (if replacement needed) | $250–$550 |
We don’t charge separately for “programming” when it’s part of a service call — it’s included in our standard opener repair or installation rate. If you’re in Parma, Cleveland Heights, or anywhere in Greater Cleveland and you’ve spent more than an hour on this, you’re likely past the point where DIY saves money. Call us at (855) 502-5513 and we’ll sort it out same-day.
Brand-Specific Quick Reference: What We’ve Learned in 14 Years
Our certification across 8 major brands isn’t a resume line — it’s the difference between a 10-minute fix and a wasted afternoon. Here’s the practical knowledge we apply in Cleveland homes:
- LiftMaster / Chamberlain: Yellow Learn button = Security+ 2.0, straightforward. Purple Learn button = 315 MHz Security+, also straightforward. Red/orange = older 390 MHz, increasingly hard to match with new remotes. If your LiftMaster has no Learn button at all, it’s pre-1993 and lacks modern safety sensors — replacement is legally required, not optional.
- Craftsman: Most Craftsman openers are rebadged LiftMaster units with identical programming. The exceptions are some 1990s belt-drive models and certain Craftsman-specific color codes. Check the actual motor unit, not just the remote, for the compatible brand marking.
- Genie: Green Learn button = Intellicode 2, modern compatibility. Blue or red Learn button = original Intellicode, may need adapter for modern remotes. No Learn button, DIP switches instead = pre-Intellicode, replacement remote required.
- Wayne Dalton: Proprietary radio systems on Quantum and Prodigy lines. We stock the specific remotes and conversion kits because hardware stores don’t.
- Raynor: Often LiftMaster-compatible, but verify the actual motor unit label. Proprietary systems in multi-unit housing require property management coordination.
FAQs
The most common reason is incompatible radio protocols — your new remote uses Security+ 2.0 or 315 MHz rolling code, while your old opener uses 390 MHz, fixed code, or DIP switches. In Cleveland’s older housing stock, we see this weekly: a homeowner in Parma or Euclid buys a modern universal remote for a 2005 Craftsman or Genie, and the frequencies simply don’t match. The “universal” claim on the packaging has gaps. Call (855) 502-5513 — we carry the specific remotes that actually work with older Cleveland openers, and we’ll program it while we’re there.
Professional programming is typically included in a standard opener service call, which runs $120–$320 in the Cleveland market. If you need a replacement remote, add $35–$85 for the part. We don’t charge a separate “programming fee” at Landmark — when Richard Anderson shows up, the programming is part of getting your system working. Free estimates mean you’ll know before any work starts. Call (855) 502-5513 to schedule.
You need a HomeLink Compatibility Bridge if your opener has a yellow Learn button (Security+ 2.0, 2011–present) and your vehicle’s HomeLink system was manufactured before native Security+ 2.0 support was added — roughly 2018 for most makes, but varies by model year. The bridge is a $25–$50 plug-in module that most car manuals don’t mention. We’ve installed dozens across Cleveland; without it, your car will appear to “train” successfully but never actually open the door. If you’re unsure whether your vehicle needs one, call us at (855) 502-5513 and we’ll walk you through checking over the phone.
If your opener is over 15 years old and won’t program due to logic board failure or obsolete radio protocol, replacement is usually the better value. A logic board repair runs $120–$320, but the motor, gears, and safety sensors on that same unit are likely near end-of-life too. New opener installation in Cleveland ranges $250–$550 and gets you modern safety features, battery backup, and smartphone compatibility. We give straight answers on this — if your old unit has another 5 years in it, we’ll say so. If it’s money down a hole, we’ll tell you that too. Call (855) 502-5513 for a no-pressure assessment.
When to Call Landmark Garage Door Installation Greater Cleveland
Programming an opener is simple when everything matches. In Cleveland’s diverse housing stock — from 1920s Tremont alley garages to 1960s Parma ranches to new construction in the western suburbs — everything rarely matches on the first try. We’ve spent 14 years sorting out these exact mismatches, and we carry the remotes, bridge modules, and brand-specific knowledge that big-box stores and generic online guides can’t provide.
I show up, I fix it right, and I tell you what I actually found — not what makes the invoice look bigger. That’s how we’ve earned 364 verified reviews at 4.9 stars across Greater Cleveland.
If you’re stuck on programming, or if you’ve realized your opener’s too old to be worth the fight, Landmark Garage Door Installation Greater Cleveland offers a no-pressure assessment anywhere in Cleveland — call (855) 502-5513 for a free estimate, or explore our full garage door opener services to see what we cover.
Written by Richard Anderson, Owner & Lead Technician at Landmark Garage Door Installation Greater Cleveland, serving Cleveland, OH.